
Jupyter notebooks and data visualisation
In this article we introduce jupyter notebooks. Once you are a fledged data science elf it is quite likely that you will spend as much time in jupyter as at the North Pole. The jupyter notebook is like a lab notebook for exploration of data - it allows you to mix explanatory text with code, data and visualisations such as plots to document your course through the area you are investigating.
Pre-requisites
Naturally, first you will need a working Jupyter notebook environment. We suggest the easiest way to get one is through Anaconda.org and - you’ll be glad to know - free for individuals to download. If you follow the link at the top of the page to download it for your operating system, when you start it you will get something that looks like this:
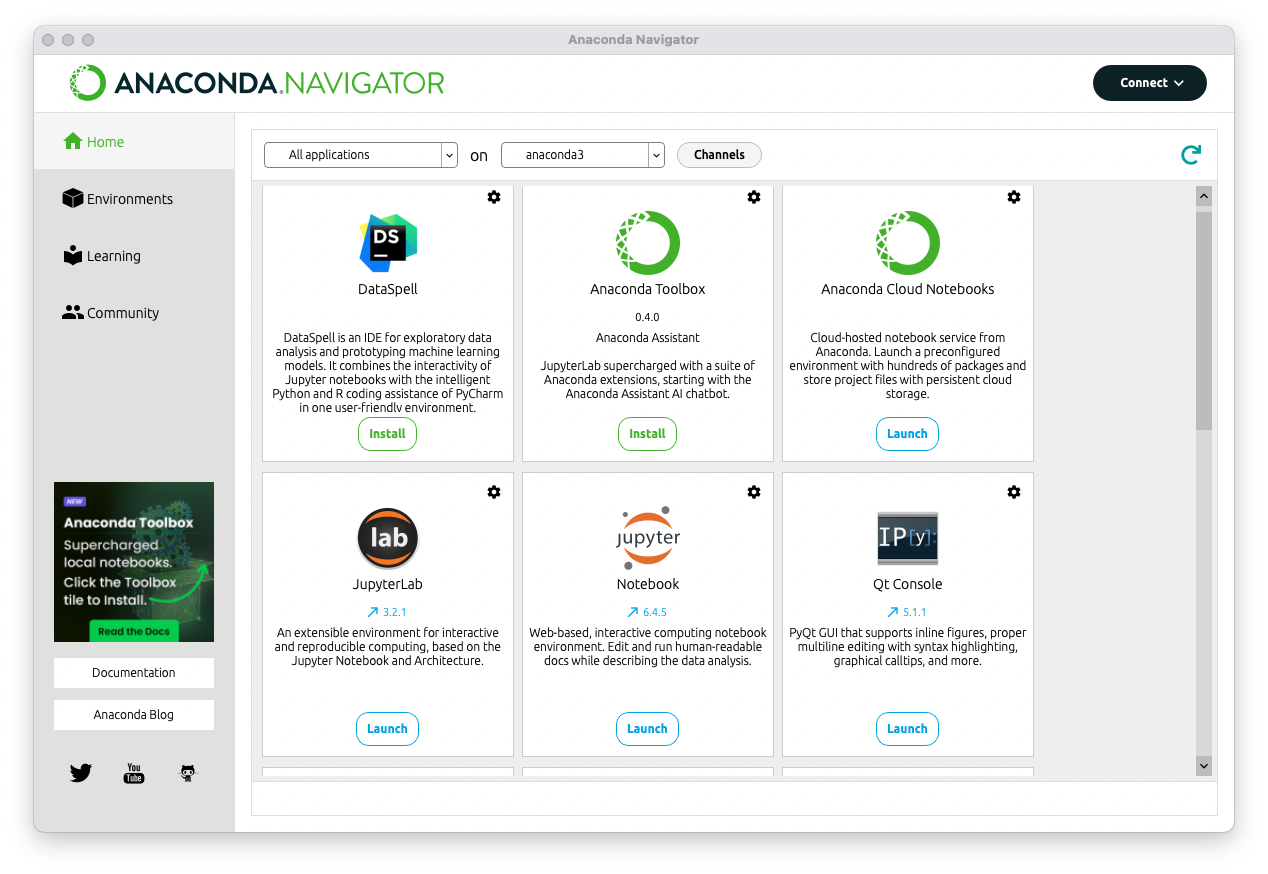
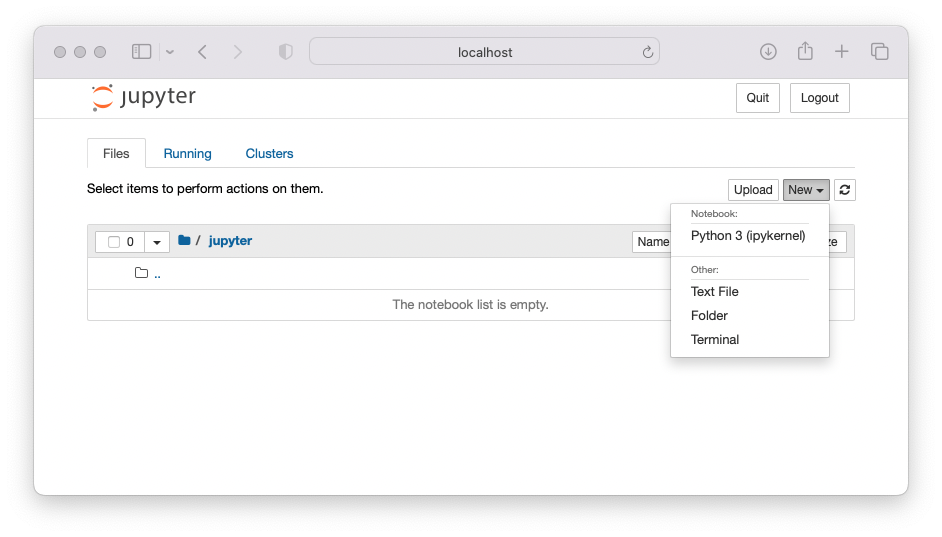
It’s the key to the door of a suite of tools for data science but also to a host of learning materials and to a hub of data science communities. For now we just need to get going with a jupyter notebook - so launch it. This will bring up a tab of a web browser showing your filing system. The next step is to launch a python notebook so do this from the ‘New’ menu:
This will launch a further browser tab that is the notebook. The most important feature of the notebook is a series of sequential ‘cells’ that can contain explanatory text or python code plus a play button for running and a stop button for aborting. The program output resulting from running the cells is displayed beneath the cell. To a blank note book I have added a few short programs to give the gist of how this is used. Programs are in ‘Code’ cells and text in ‘Markdown’ cells - you can select this as desired.
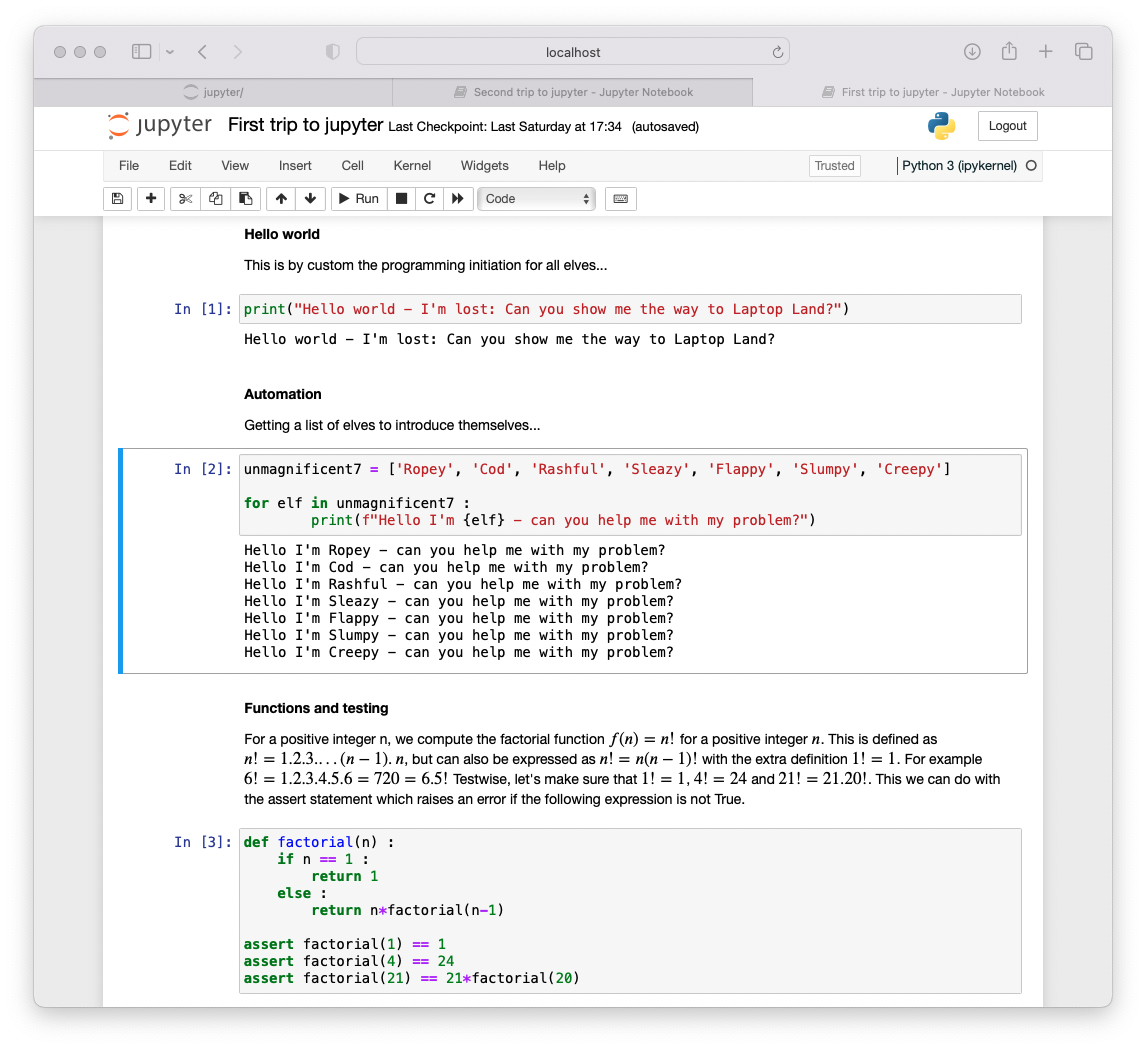
Time next to give it a whirl - bring up a notebook and type in an example from a previous article in this series. Try using python as a calculator:
1234*5678
You could even be bold and ask ChatGPT. Try the prompt:
I have experimental data points (1,2), (2, 3.2), (4, 3.9), (5, 6.1)
- give me the python code to plot the regression straight line
of best fit through them.
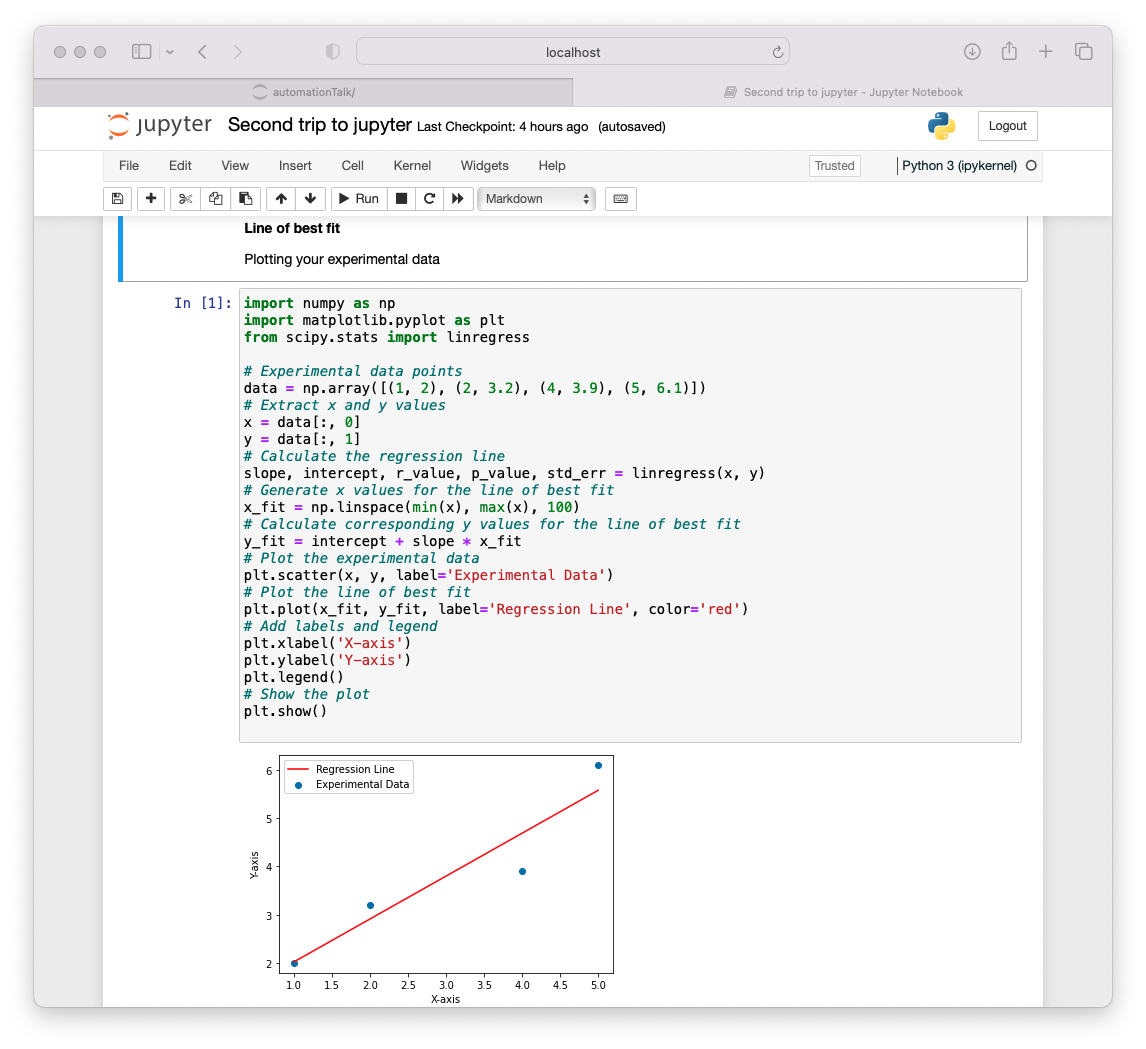
Results from pasting the answer into the notebook are as in the screenshot - that ain’t so difficult!
If you are using this type of code you will need to add some tests. You can ask GPT for the test code too – but not for the answers!
Words of warning: Engage with and try to understand the code – what you are given may not always be correct, but ChatGPT has given you comments to help understand the solution so that you can modify it to your liking. The most common thing you might want to do here would be to modify the axis and legend details, and that you can do with very minimal experience of python…
2026 Update: AI inside Jupyter
Since this article was written AI has become even more tightly
integrated with Jupyter. GitHub Copilot now works inside notebooks,
suggesting the next line of code as you type. You can also paste your
df.info() output into Claude or ChatGPT and ask “What patterns
should I look for in this dataset?” to get exploration suggestions
tailored to your data. For NHS data exploration, this means a
clinician can go from “I have a CSV export from our RIS” to meaningful
insights much faster. The AI does not replace the curiosity and domain
knowledge you bring to data exploration, but it handles the syntax so
you can focus on the questions.